Building HoloLens App with Unity and MRTK Part 2 (Project Setup)
Unity is a versatile game engine that is very popular to create Mixed Reality, Virtual Reality and Augmented Reality experiences. We will use it to create the HoloLens project and import the Mixed Reality Toolkit package to make things even easier.
Setup Unity project
This post is part 2 of the series "How to create apps for HoloLens 2 in Unity". The other posts can be found here:
[Part 3] -- Application development
[Part 4] -- Building application
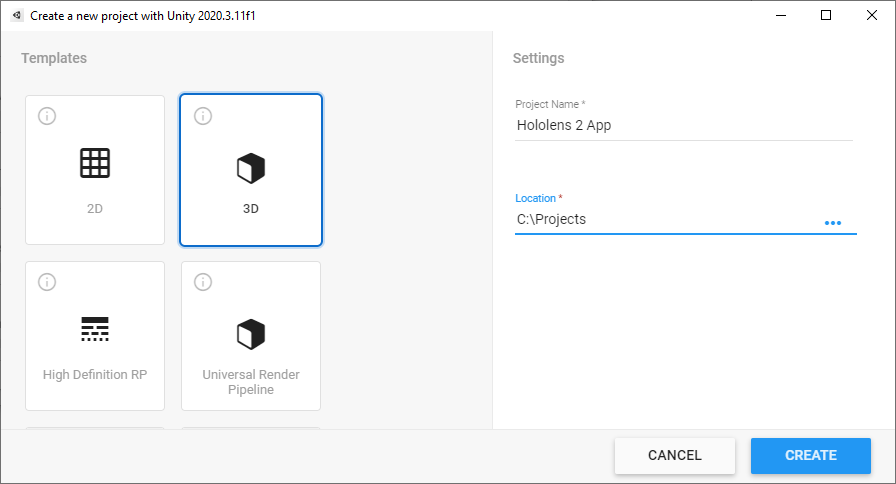
1. Create NEW Unity project and select 2020.3.xf1 version

2. Choose 3D template, Name and Location path
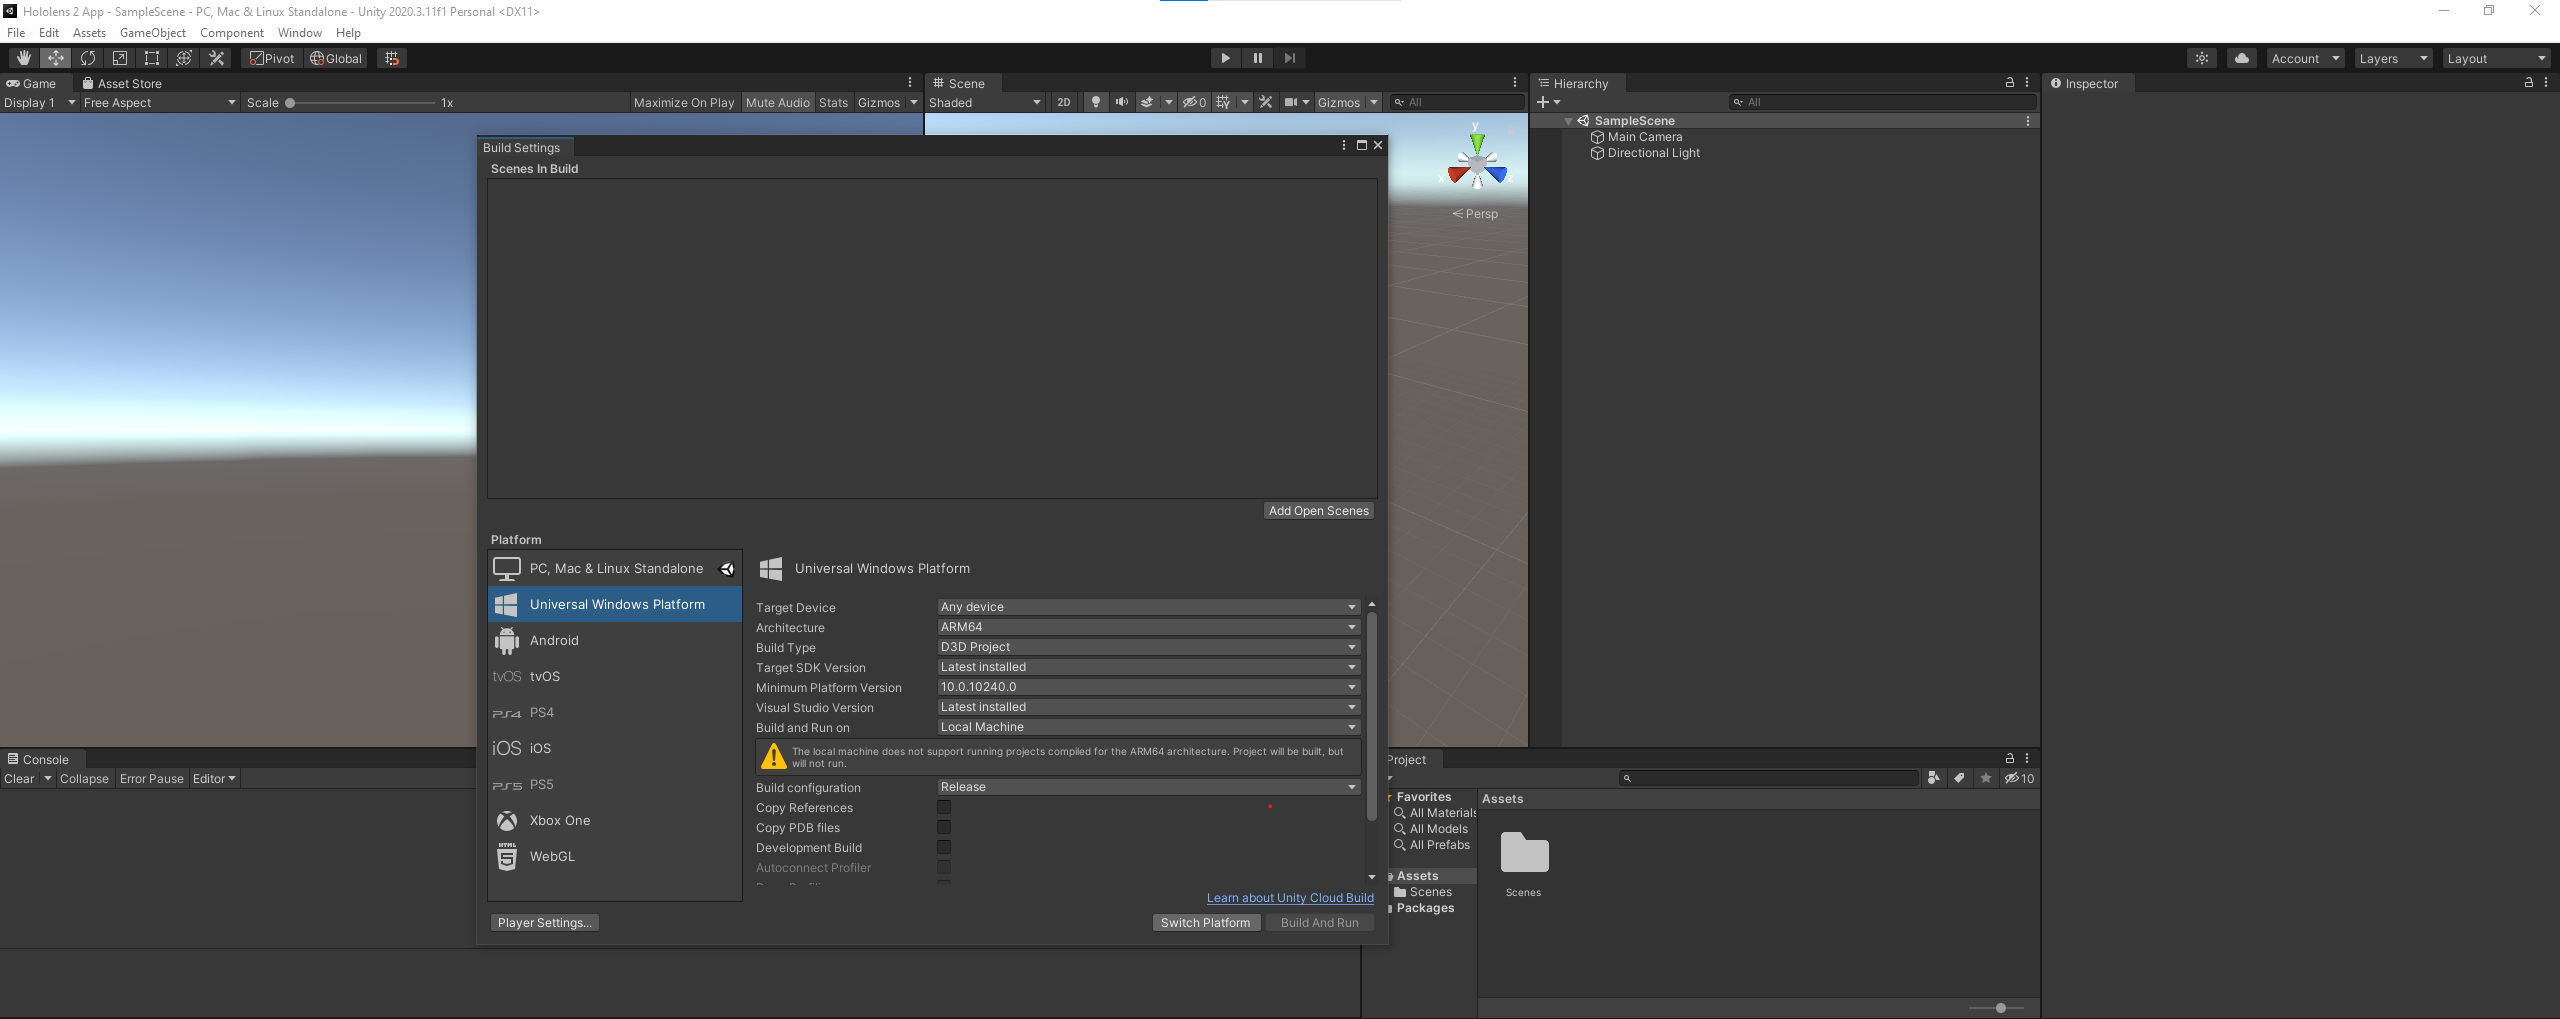
3. In Unity go to File → Build Settings and choose Universal Windows Platform (UWP) and set Architecture to ARM64 then click Switch Platform
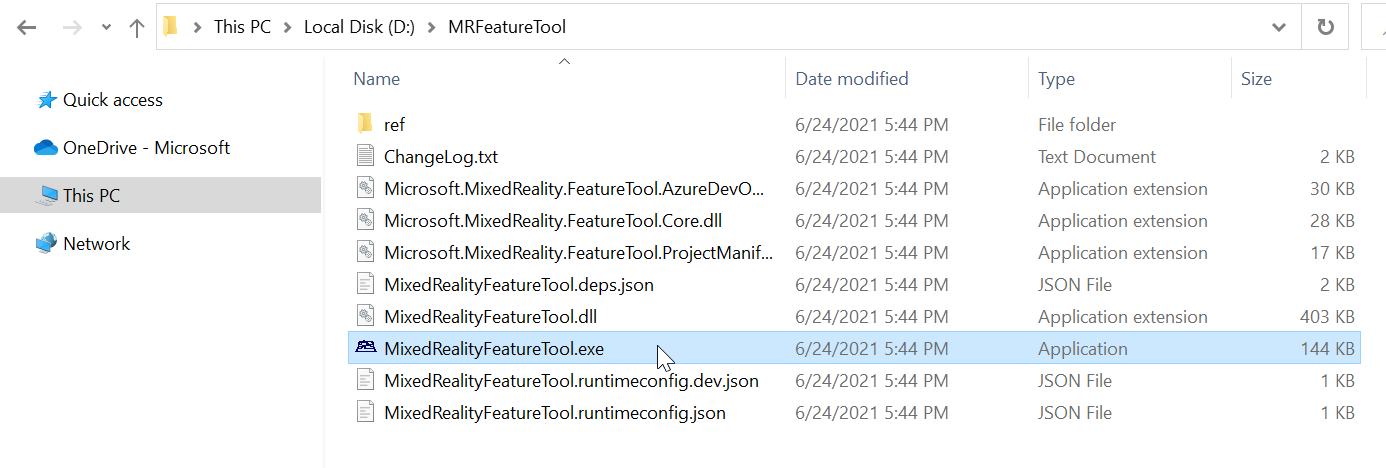
4. To install Mixed Reality Toolkit - MRTK(which provides the basic building blocks for Unity development on HoloLens, Windows Mixed Reality, and OpenVR)download and unzip Mixed Reality Feature Tool which you can find here and click download ( you will need to install .NET 5.0 runtime )
5. Close Unity and run MixedRealityFeatureTool.exe
6. With Mixed Reality Feature Tool click ‘Start’ and wait (this may take some time) for the list of features to appear, then choose Mixed Reality Toolkit Foundation and Mixed Reality OpenXR Plugin. You can choose more features if needed.Click Get Features and choose the root folder of your project then click Import, and Approve.

7. Configure the Unity project:Run Unity and select Unity OpenXR Plugin in the MRTK Project Configurator Window that should appear.
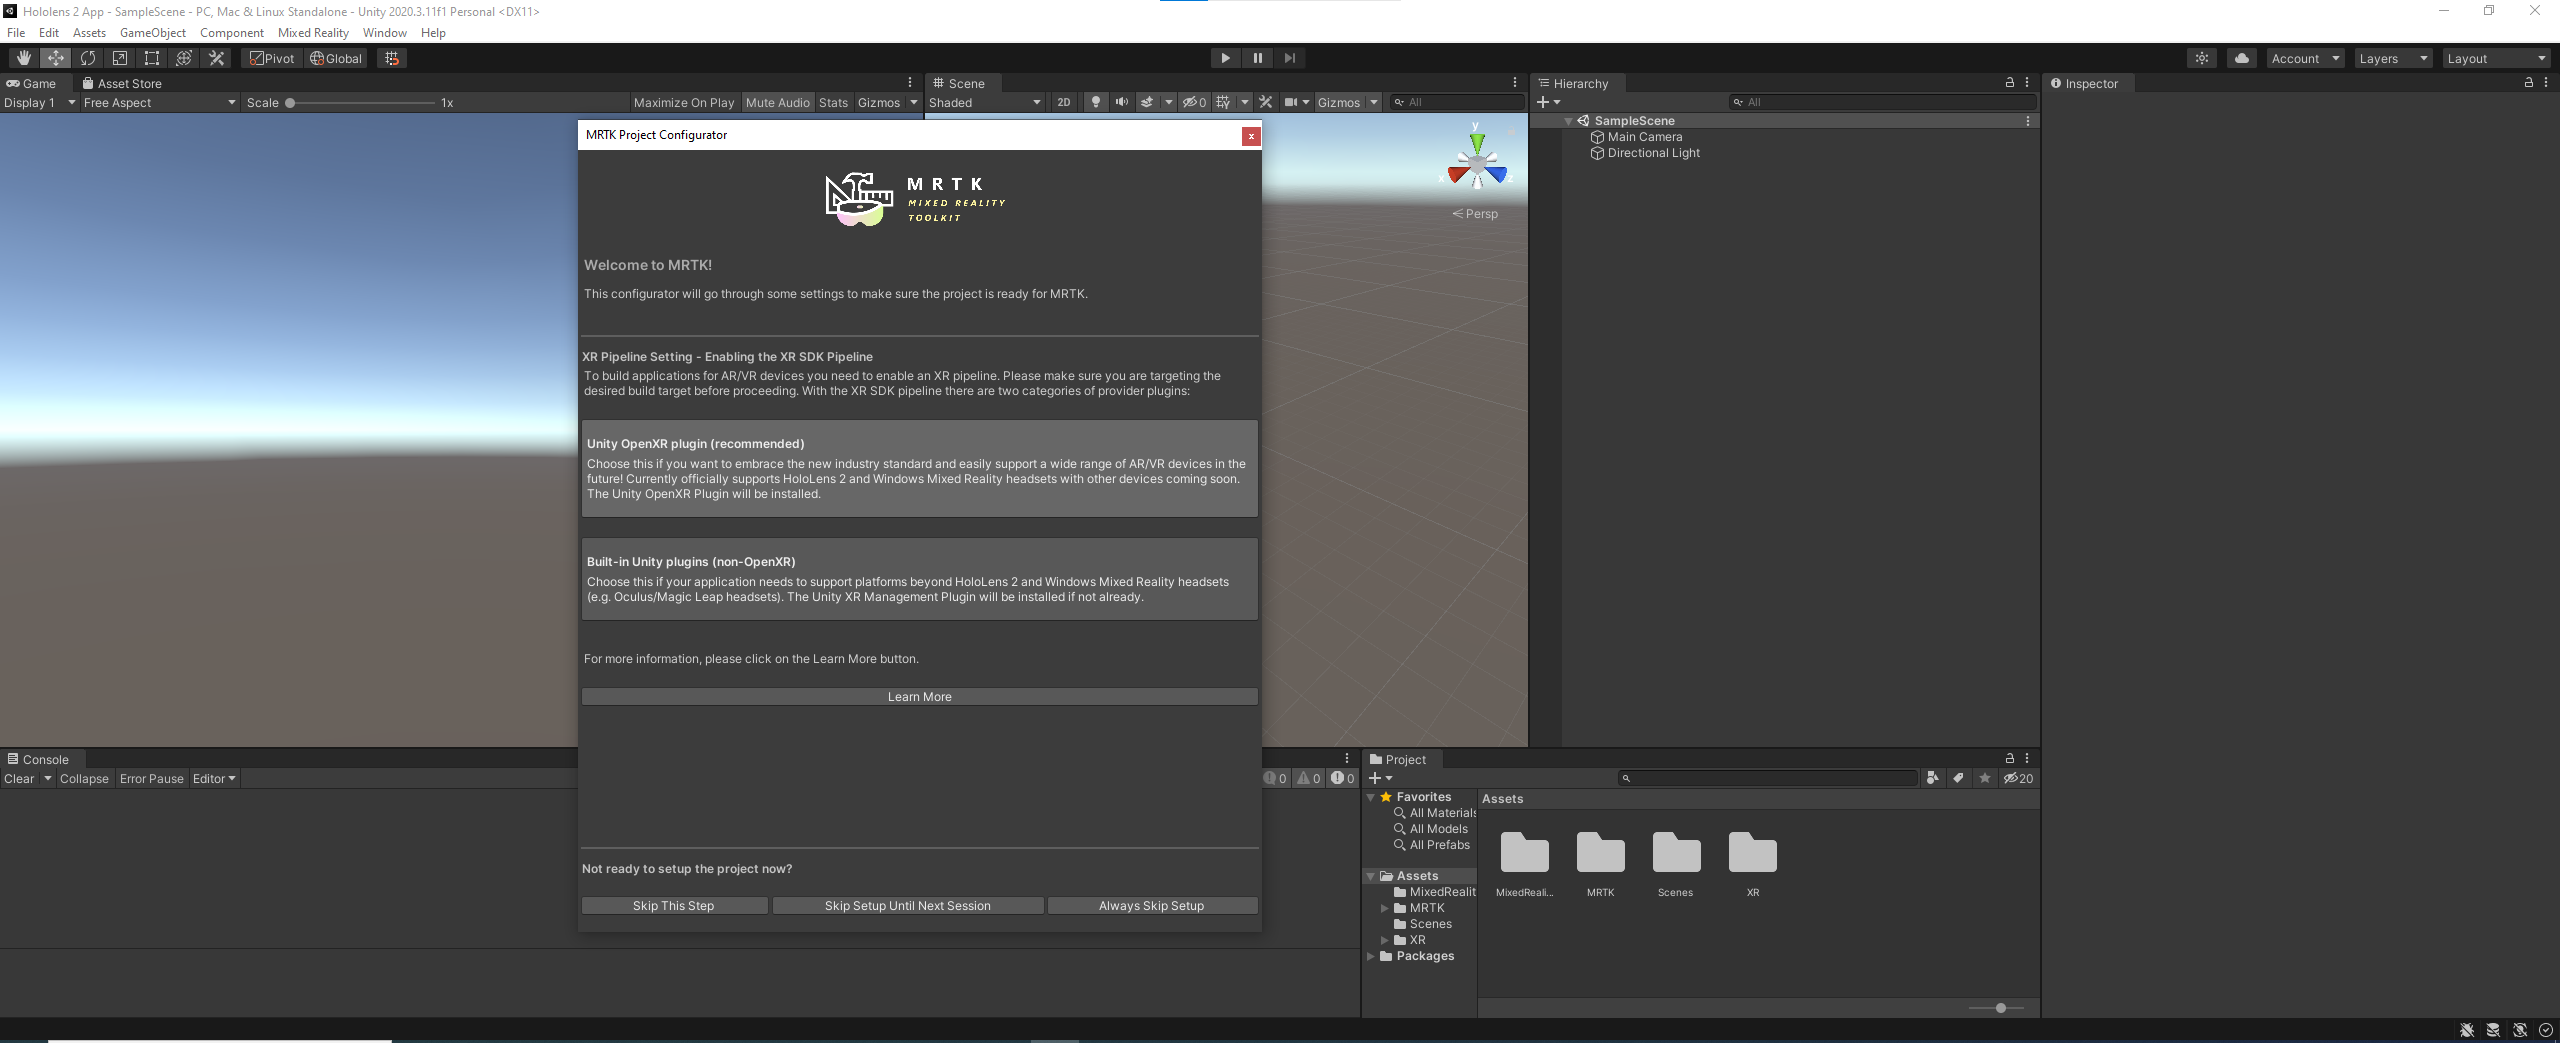
8. Follow the instructions, then in Project Settings → XR Plug-in Management → OpenXR, check: Depth Submission Mode to Depth 16 Bit and Interaction Profiles to Microsoft Hand Interaction Profile.
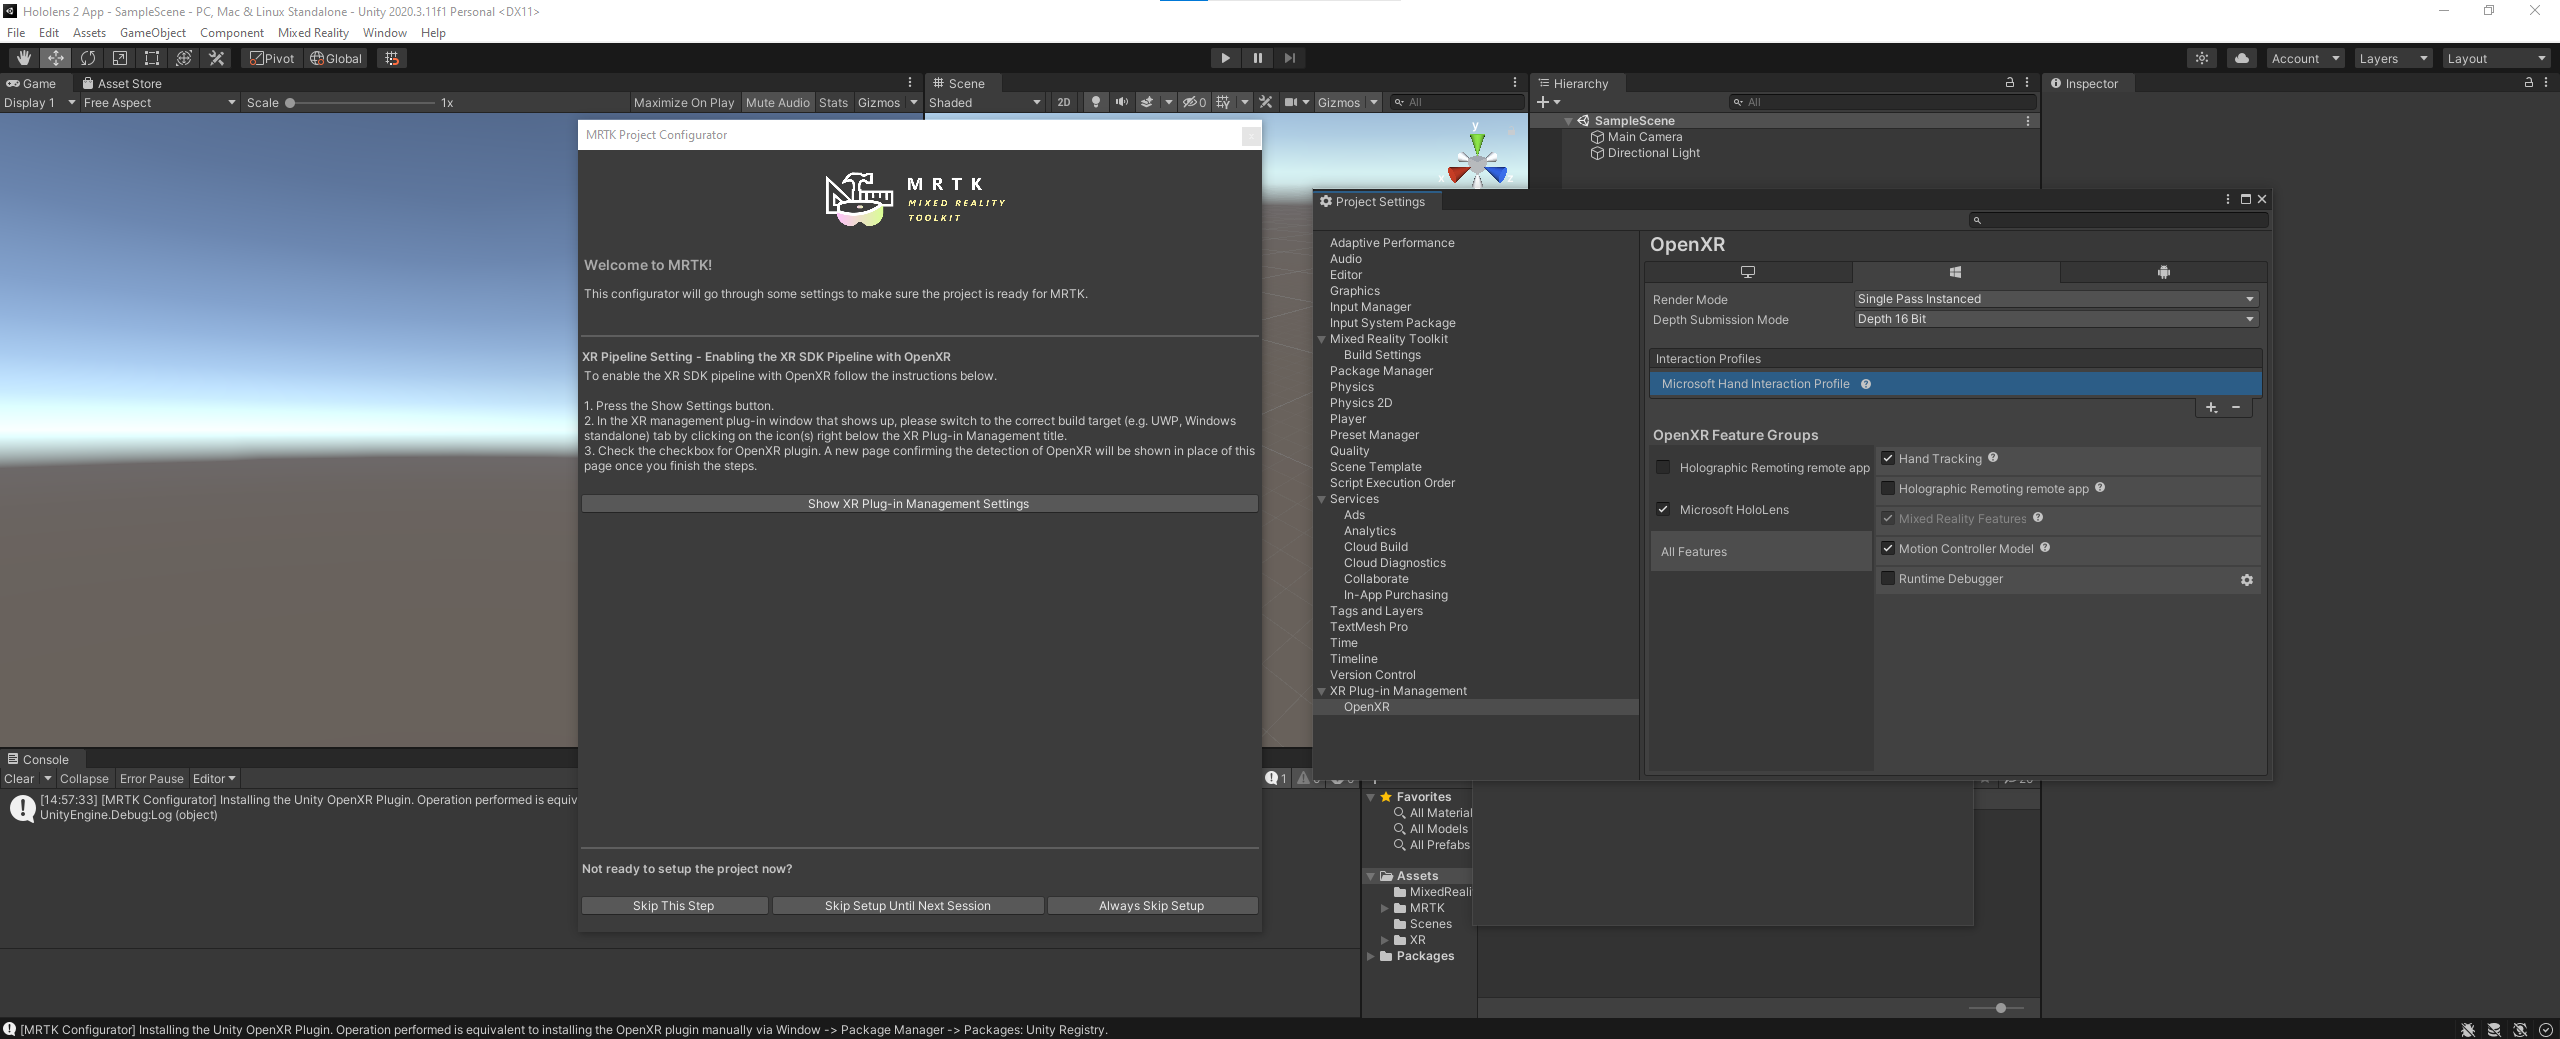
9. Click Apply Settings then Next and Apply in MRTK Project Configurator Window and restart Unity(If ‘Apply Settings’ button doesn’t show up after changing settings you can close MRTK Project Configurator Window and click Mixed Reality → Project → Apply recommended project settings for HoloLens 2)

The next step with Apply Settings button should appear.
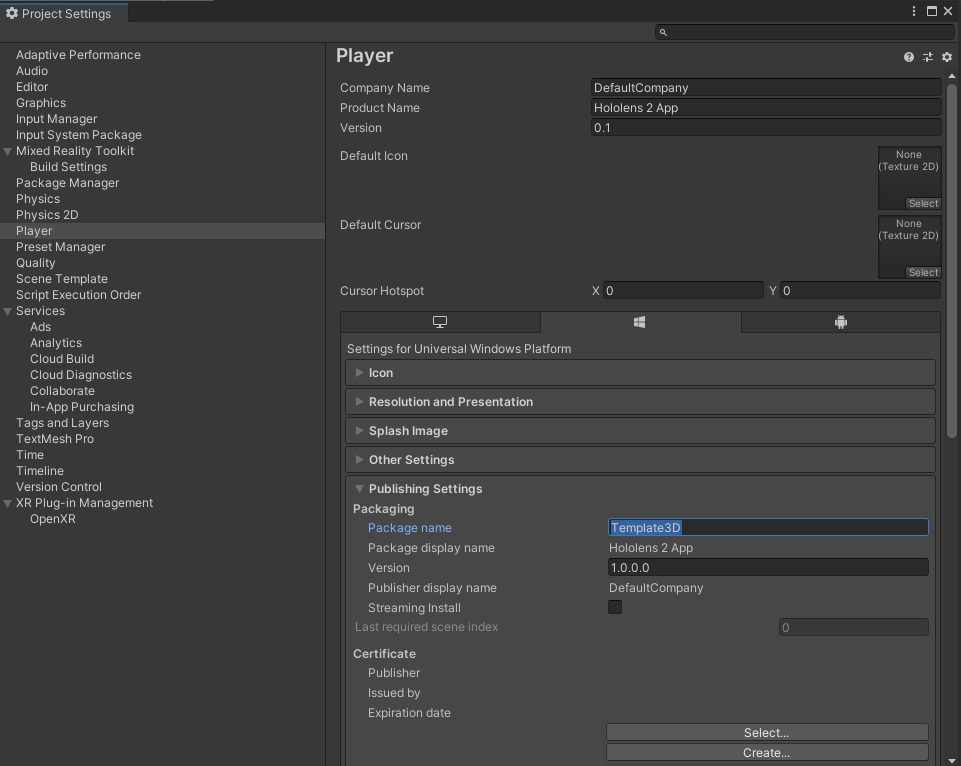
⚠️ In Project Settings → Player → Publishing Settings change the Package name to unique name (not default “Template3D”).
This is important! It prevents overriding another App with the same Package name when deploying app to device.
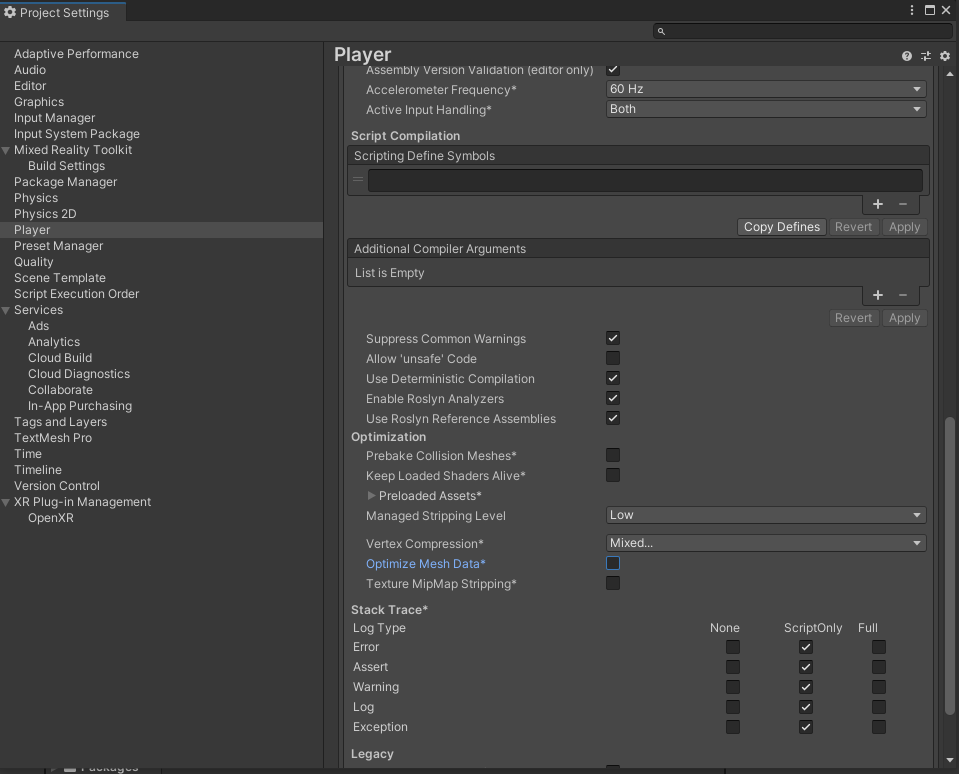
11. You may want to uncheck Optimize Mesh Data in Project Settings → Player → Other Settings to significantly reduce build time.
12. Now (as well when creating a new scene) remember to setup the scene by clicking Mixed Reality → Toolkit → Add to scene and Configure.This will add ‘MixedRealityToolkit’ and ‘MixedRealityPlayspace’ gameobjects to the scene.
Connecting over Wi-Fi.
Using HoloLens for the first time you'll be guided through connecting to a Wi-Fi network. However if you want to connect to different network follow this steps)
- Navigate to ‘Settings’ on your HoloLens
- Select Network & Internet > Wi-Fi. Make sure Wi-Fi is turned on. If you don't see your network, scroll down the list.
- Select a network, then select Connect.
- If you are prompted for a network password, type it and select Next.
Setting up HoloLens to use Windows Device Portal and to connect with your PC
1. Navigate to Settings on your HoloLens
2. Select the For developers menu item.
3. Enable Developer Mode.
4. Scroll down and enable Device Portal.
5. Select Pair to generate a pairing PIN. Leave the Settings app at the PIN popup until you enter the PIN into Visual Studio during your first deployment.

6. Look up your device's IP address by either:
- Going to Settings > Network & Internet > Wi-Fi > Advanced Options.
- Going to Settings > Network & Internet and selecting Hardware properties.

- Using the "What's my IP address?" voice command.
7. From a web browser on your PC, go to https://<YOUR_HOLOLENS_IP_ADDRESS>
The browser will display the following message: "There's a problem with this website's security certificate" because the certificate, which is issued to the Device Portal is a test certificate. You can ignore this certificate error for now and continue.
Previous section: [Part 1] -- Pre-requisitions
Next section: [Part 3] -- Application development